Tips for making a good educational video
In this short video, you will get some tips about the dos and don'ts of recording your own videos at home or in your office, including examples of good and bad choices with regards to camera angles, lighting and sound. You will also get a number of technical tips to improve your videos.
Note: if you're having trouble viewing the video, you can view Tips of Making a Good Video on Panopto.
For more detailed information, please check out the tips on the following pages/ tabs below.
Preproduction
Why you should plan and prepare
- You will save time. It is much more time-consuming to make changes in a video than it is on a slide or in a word document. Poor planning or lack of thorough fact-checking can mean having to reshoot a video. Good planning will help you create a resource that you can reuse multiple times. At a minimum, create a bullet point list with things you want to talk about, and proofread slides if you are using any.
- Your videos will be right for the course. Videos don’t allow you to read the room and get immediate feedback if something is unclear or does not work. Good planning will help create content that is clear, concise, on topic, relevant and appropriate for the students of the course.
- Planning is a must for fancy videos (if relevant for your course). Any video that involves other people (incl. VUW support staff ), special locations, or special gear, needs to be planned - people are busy, locations require consent or aren’t always available, gear needs to be organised and takes time to set up, post-production might be required and can’t be done overnight.
Some questions to get started when planning a video (or a series of videos)
- Who is your audience?
- What style of video is appropriate for your audience and content?
- Have you got previous experience or some examples of videos in the style that you envision?
- Do you have existing content or do you need to create new content?
- How will the videos be used in your course?
- How will the videos align with the learning objectives of your course?
- How many videos do you need? Are they all the same style?
- What kind of location and background will work best?
- What tone will work best for your videos?
- What kind of content do you want to show? Is everything copyright compliant? Do you need to resource additional assets?
- Are there any external stakeholders involved?
- How much time do you have to plan and produce the videos?
- Do you need any additional support?
Formatting and designing slides for video
- Choose a simple background and design and use it consistently throughout the course
- Use a font size that can be read on small screens and avoid a wall of words
- Follow accessibility guidelines
- Make slides dynamic with animated bullet points, but avoid overuse (especially fast and blurry effects)
- Plan where you will appear in relation to the slides - not at all, on the side, or as picture-in-picture? You can learn more about Panopto's different viewer and video podcast output options on their support pages.
- Fact-check and proofread your slides! Correcting errors on a slide is done quick and effortless; correcting errors in a video can be time consuming and might mean having to re-record.
To script or not to script?
A script can help manage the flow of content in a succinct and time efficient way. But writing a good script also takes time and often multiple revisions, and reading it from a teleprompter without sounding like a robot is yet another skill in itself. Scripts may not always be necessary nor practical, especially if you have many videos to record. Instead, try the following:
- Bring some bullet point notes - it’s fine to look at them in a video lecture or interview
- Do a test run with timer and/or camera to practice tricky sections and keeping it short
- Don’t worry if you stumble - it makes you human, and minor mistakes can still be edited out in Panopto
- You might not have time for an elaborate script, but it pays to think about what you want to say at the beginning of a video
First impressions count
The first few seconds of a video can make a big difference in terms of how engaged your students will be with the video and whether or not they will watch keep watching it. Here are some ideas for hooks to draw them in:
- State clearly what is important about the topic
- Pose a question (Why is it that ...? Did you know that ...? Have you ever thought about ...?)
- Tell brief story or anecdote that relates to the topic
- Make a bold statement
- List items that have something in common
- Start with an important quotation
- Reveal a surprising fact, statistic, link between things
- Point out a familiar misconception about a topic
- Point out familiar thing or concept and reveal how it’s not that simple
- Start with a visual description and attention-grabbing asset
- Give a relatable example or analogy
Can't I use anything as long as it's for educational purposes?
No, unfortunately not. New Zealand does not have the same “Fair Use” copyright exemptions that exist in other countries, such as the USA. For internal courses, you can use text, quotes, images, graphs, statistics etc. from print material in the library, as long as you are not copying more than one chapter or more than 10% of an entire book. If you want to use other types of copyrighted material (e.g. poems, film clips, music, ...), check with your subject librarian or try contacting the copyright holder if you're in doubt).
The university homepage also has detailed information about Copyright for Learning and Teaching.
The university homepage also has detailed information about Copyright for Learning and Teaching.
Copyright DOs
|
... and Copyright DON'Ts
|
Finding and using images, icons and other copyrighted media without violating copyright
Using images, icons and other media on Blackboard, in videos and on slides can add useful information and visual appeal to a course. Below you can find a selection of sources to find images, icons, and other media that you can use without risking copyright violations
- Pixabay - a collection of free stock images that do not require attribution
- Unsplash - a collection of free stock images that do not require attribution
- The Noun Project - a collection of icons that can be used for free with automatic attribution. For a small fee you can also modify icons and remove the attribution.
- Wikimedia Commons - a collection of freely usable images and other media sources. Some of them require attribution.
- Creative Commons - a collection of resources licensed under a creative commons license, along with information about creative commons.
- If you use Google Image Search, select Tools > Usage Rights > Labeled for reuse with modification.
- Keep videos short and file sizes small, so that students with slower bandwidth and limited data plans are able to stream and possibly download the videos.
- Caption your videos with Panopto's automatic captioning service. Note that this not always 100% accurate, so consider checking and manually adjusting technical terms, specific names, foreign language words that are relevant for the subject.
- Verbally describe important visual elements with as much detail as you need to. For example, say "this image of a mature Rimu tree", rather than "this image".
- If you use external video sources in your teaching, for example from Youtube or Vimeo, consider if the videos will be accessible to any distance students you might have in your course. For example, Youtube videos are not able to watched in China.
Production and DIY filming
Looking and sounding good on camera
- Smile - during the recording, and for 3 seconds before and after you start and end talking – this gives you better flexibility when trimming the video
- Look into the camera, make eye contact, and imagine you’re talking to a person. If it helps, pin a smiley face, a photograph of your pet, an image of a classroom full of students next to your camera.
- Make purposeful pauses and give your learners time to digest and reflect
- Talk like a human: use a friendly, conversational tone, intonation, gestures. If you stumble on occasion, don't worry about it – just keep going like you would during a live lecture
- Talk into the microphone, but avoid being too close and huffing and puffing into it
- Turn off the phone, email notifications etc. - distracting sounds can ruin a great take
- Decide if you want to sit or stand: Standing gives you energy and makes breathing easier, but it can be tiring for long periods of time. If you sit, make sure you do so relaxed and with a good posture, and don’t swivel with your chair. If you stand, stay near the microphone and don’t walk out of the frame.
Dress for video success
What looks good on a person in general may not be too flattering on camera. Here are a few things to consider.
Choosing your on-camera outfit
|
Pitfalls to avoid
|
Setting the scene
- If you film in your office, set the scene with a professional and uncluttered background; shelves, pinboards, books etc. are fine but avoid a distracting display of chaos that draws attention away from you and your slides / content
- Any special location should be relevant to the course or lecture topic (e.g. filming a biology lecture at the zoo or Zealandia, a political science lecture at parliament, ...)
- Check in advance if you need to arrange permission to film in an external location. This applies to private and public places (e.g. National Library, Te Papa...) and even some spaces at the university (e.g. Marae)
- External indoor and outdoor locations can be unpredictable due to people, noise, wind, weather, etc. Show a photograph of the location on a slide (or a a virtual Zoom background) as an alternative.
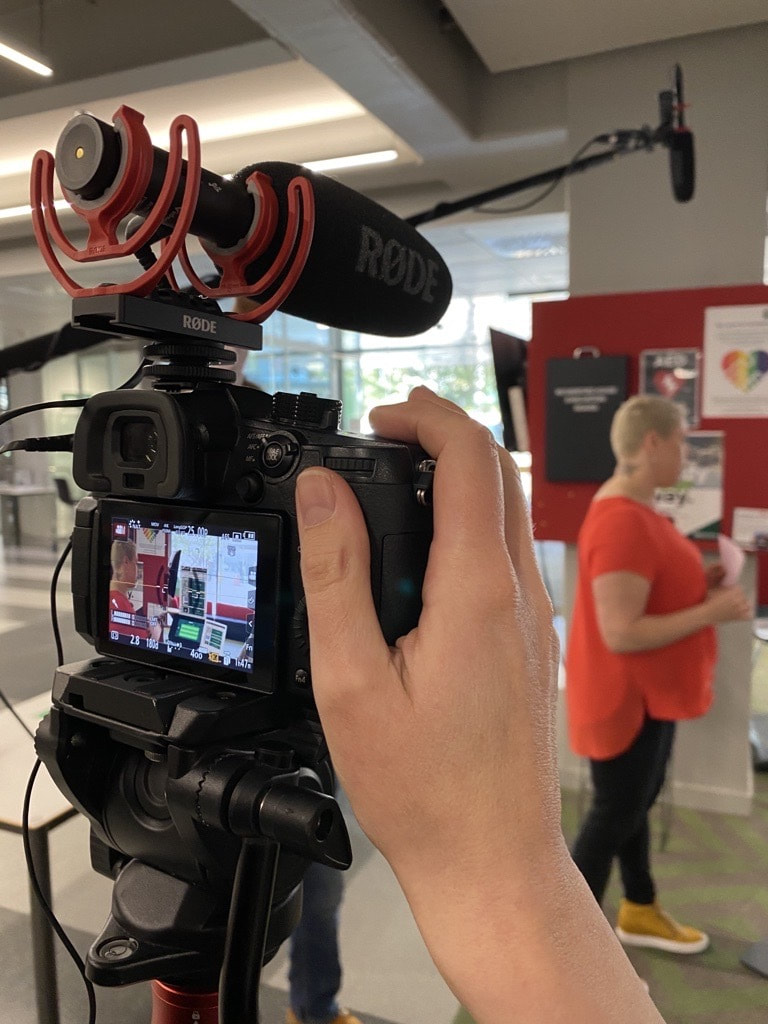
Why good sound matters

|
Video is often thought of as a visual medium. But it is in fact an audio-visual medium, and sound quality matters a great deal more than many might think. Bad sound has the potential to ruin any video. Think of it this way: many educational videos still make sense without the image, even though some details might be lost; but how much do you understand of what the presenter is trying to convey with the sound switched off?
|
How to record good sound
Panopto does not have any sound editing functions. While having access to a more sophisticated editing tool can help, it can be hard and time-consuming (and in some case impossible) to fix afterwards. Here are some tips to record good sound right from the beginning:
- Always use lapel microphones for your lecture theatre recordings and make sure they are switched on. It is not possible to retrieve an audio track for a lecture recording when it has not been recorded in the first place.
- Many external (plug-in) webcams have inbuilt microphones that can record decent enough sound for videos recorded in your office or a similar location. But don’t rely on inbuilt camera/laptop/phone mics, especially not when recording outdoors or multiple people. If you have the option, use an external microphone whenever possible. This could be a lapel microphone, or a multidirectional table microphone if you are recording multiple people in a conversation.
- Avoid noisy locations (e.g. cafes) or windy days; be mindful of everyday noise (idling bus, reversing truck...). Even seemingly innocuous surround sounds can become a dominant and unwelcome distraction in a video (e.g. fridge humming, heat pump or air conditioner).
- Make sure nothing touches the microphone (avoid especially clunky jewellery, buttons, someone accidentally flicking a pen, …)
- Briefly test playback quality before recording the entire lecture / video, ideally with headphones. If you are filming an interview with one or more external presenters, test your audio equipment in advance
Getting help and feedback
If you're not entirely sure yet what type of video would be best suited to your course, have a look at the Ideas and Examples pages. You can also contact a Learning Designer or Media Designer if you want some advice or feedback on your ideas – the earlier the better.
This page was last updated March 2022
Composition
|
Example of a bad camera angle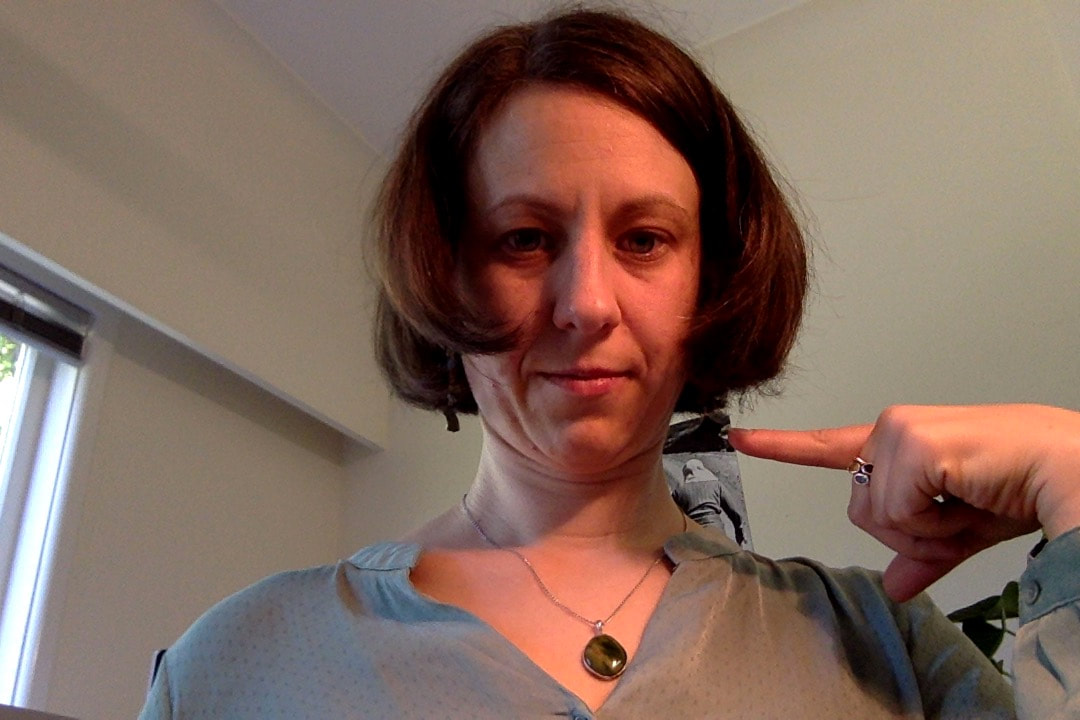
|
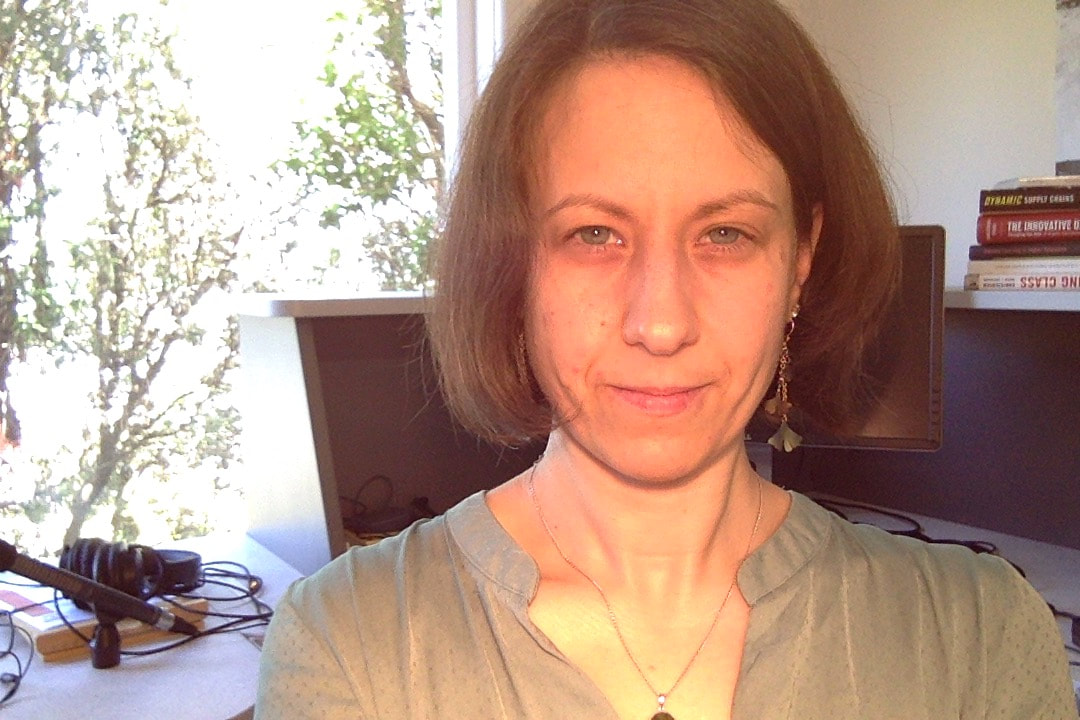
Lighting
|
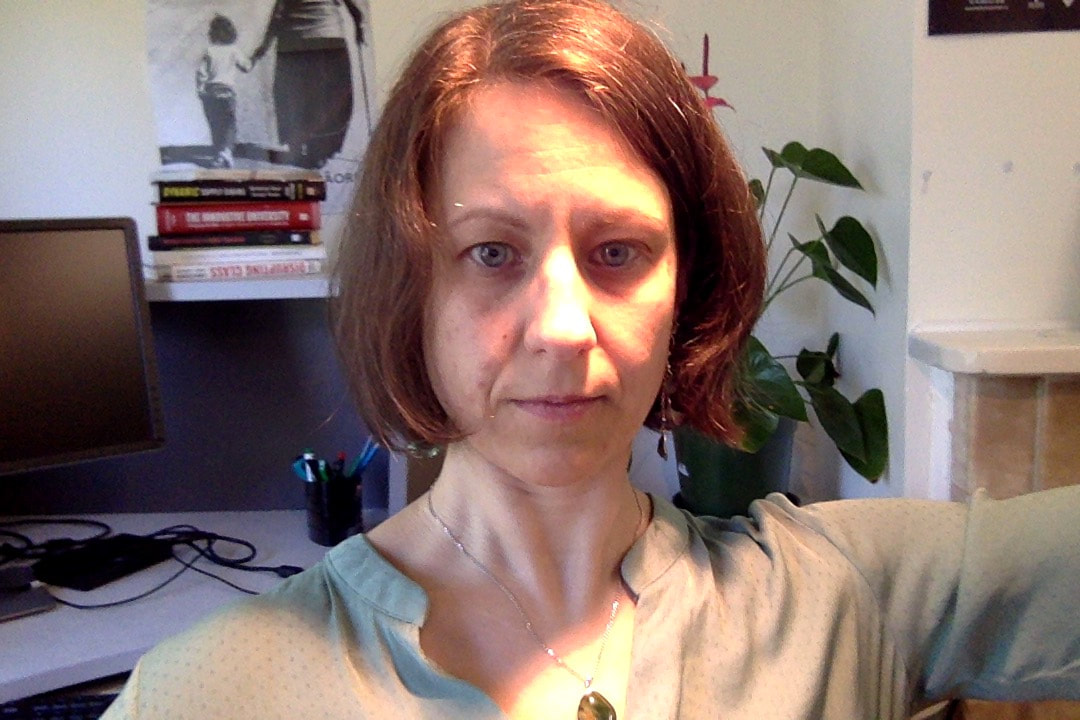
Examples of bad lighting |

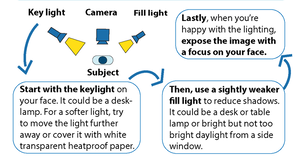
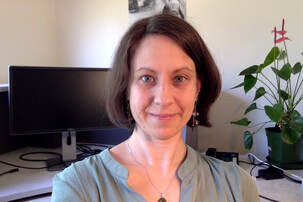
Quick guide to two-point lighting in your office
|
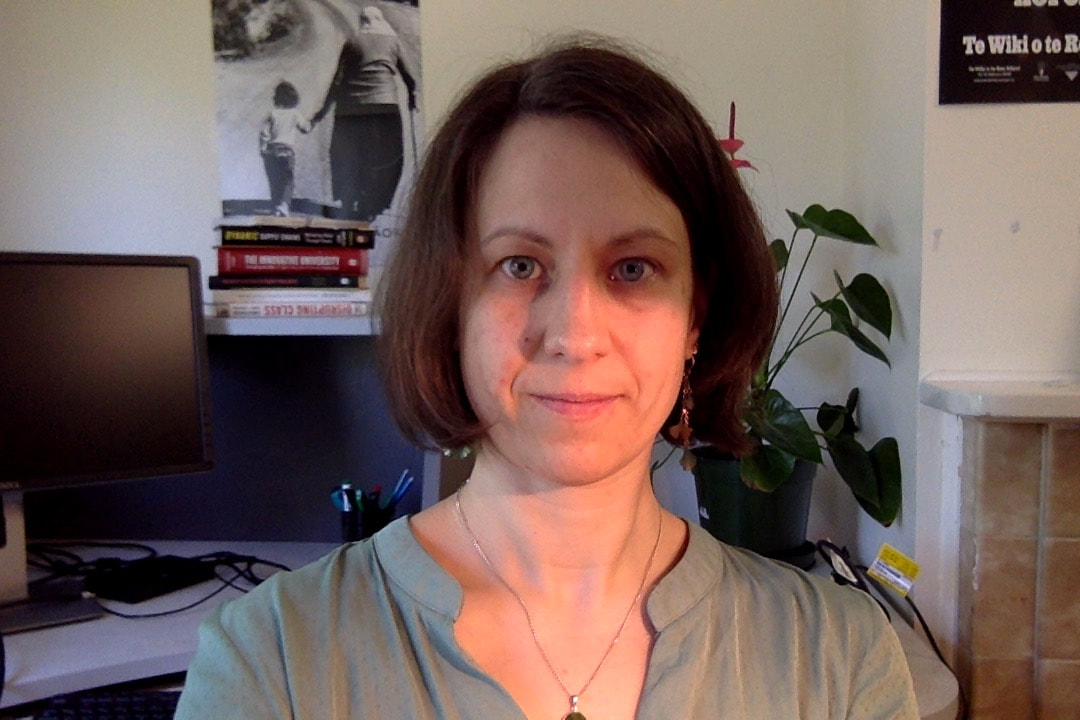
First, start with the key light on your face. It could be a desk- lamp. For a softer and more flattering light, try moving the light further away or cover it with white transparent heatproof paper (baking paper might to the trick). Second, use a slightly weaker fill light to reduce shadows. It could be a desk or table lamp or bright but not too bright daylight from a side window. Last, when you’re happy with the lighting, expose the image with a focus on your face. |
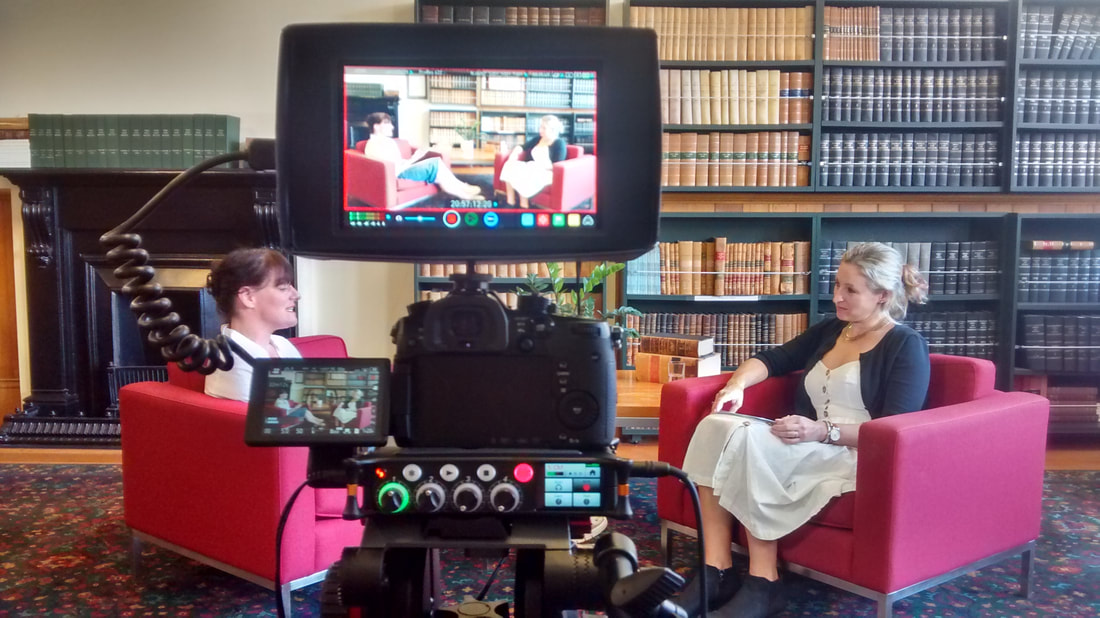
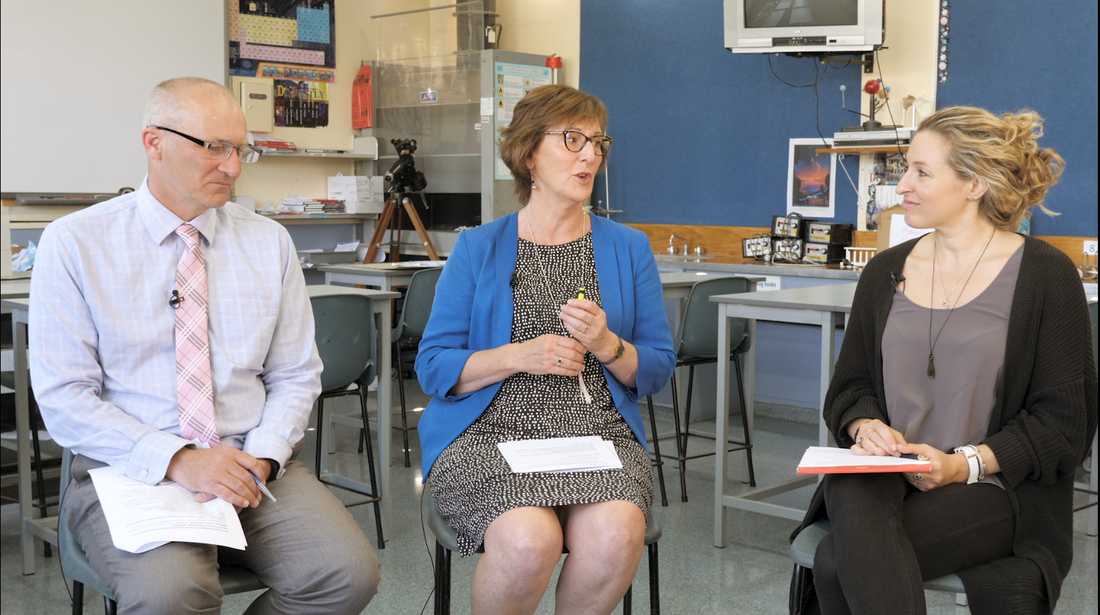
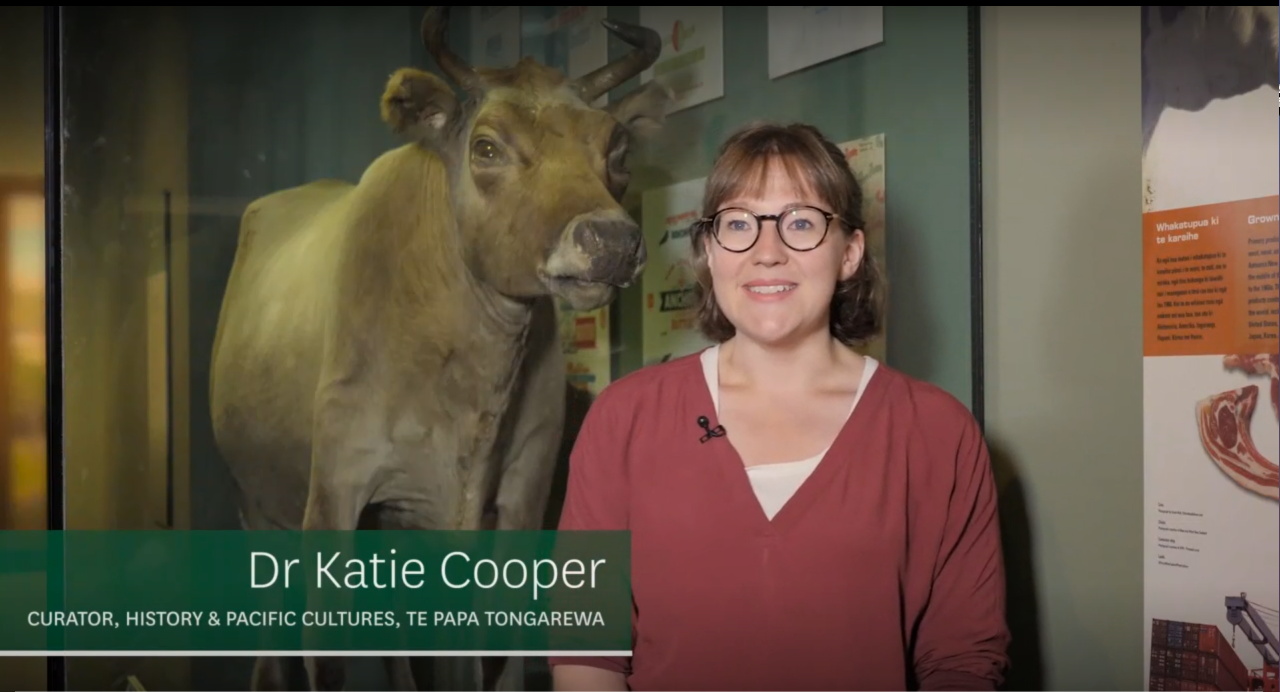
Interviews can add great value to a course. They can bring in diverse perspectives and insights from experts and practitioners who would be unavailable for classroom sessions.
You can record online video calls, invite interviewees to the studio, or film them on location. For some inspiration have a look at some of the example interviews in our ideas and examples section.
Regardless of who your interviewee is and what style of interview you film, you should always be respectful of your interviewee's limited and precious time. Be well-prepared (and help them prepare) to make the most of the time that you have arranged with them in advance.
How to prepare great interviews
- Send the questions to your interviewee in advance
- Tell them what you want get out of them, give them necessary information about the audience (e.g. students in your course), and how long you're expecting the interview to take
- Remind the interviewee to stay on topic if necessary
- Remind them of clothing requirements if appropriate
- Get them to sign a model release form, or at a minimum, get a written agreement in the form of an email statement that specifies where the video can be used and if there are any constraints such as time limits
- Schedule well in advance if you need to book the studio, arrange location consent, borrow equipment, and /or require tech support

|
|
|
|
Filming an interview by yourself
Filming an interview by yourself is possible, but it helps to think about the interview set up in advance. Here are some suggestions what you should think about:
Is the interview face-to-face in a physical location or is it a Zoom interview?
A Zoom interview makes many things easier: You can use the Zoom record function to record, the interviewee can share slides, and no travel is required. The only equipment required is a webcam and potentially an external microphone.
But: you have little control over the interviewee's set-up, so it pays to check the following things in advance: do they have a reliable internet connection? A webcam and good quality microphone? A quiet location where they can record?
But: you have little control over the interviewee's set-up, so it pays to check the following things in advance: do they have a reliable internet connection? A webcam and good quality microphone? A quiet location where they can record?
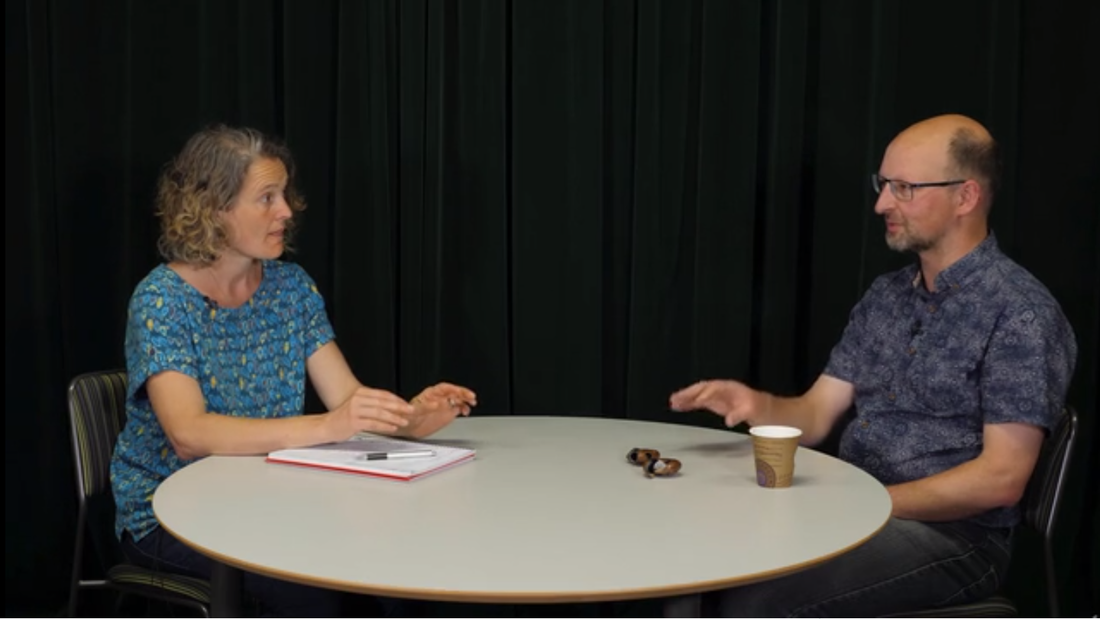
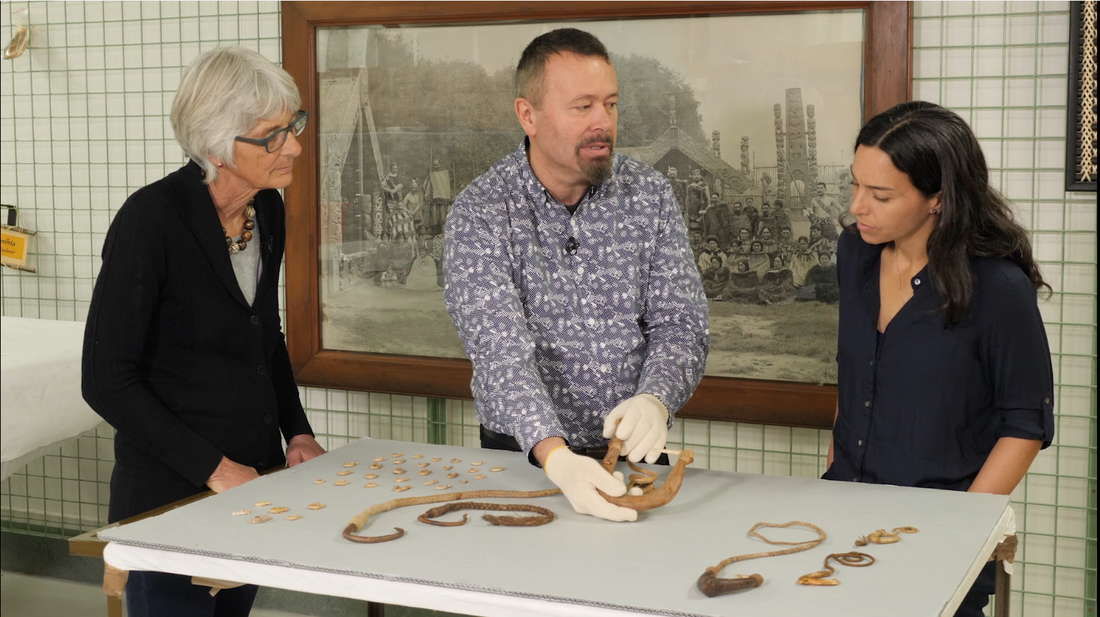
How many people will be visible on camera?
Just the interviewee, or both you and the interviewee?
If more than one person should be on camera, can they all be visible in the same shot? Having everyone in the same frame creates a slightly bigger distance between subjects and audience, but it has the advantage that you only need one camera. Plus, you won't need to do any editing afterwards. If it's a long conversation, it can seem a bit static without any cuts, but that's ok – as long as your audio is clear, your audience can treat it like a podcast and listen to what is being sad.
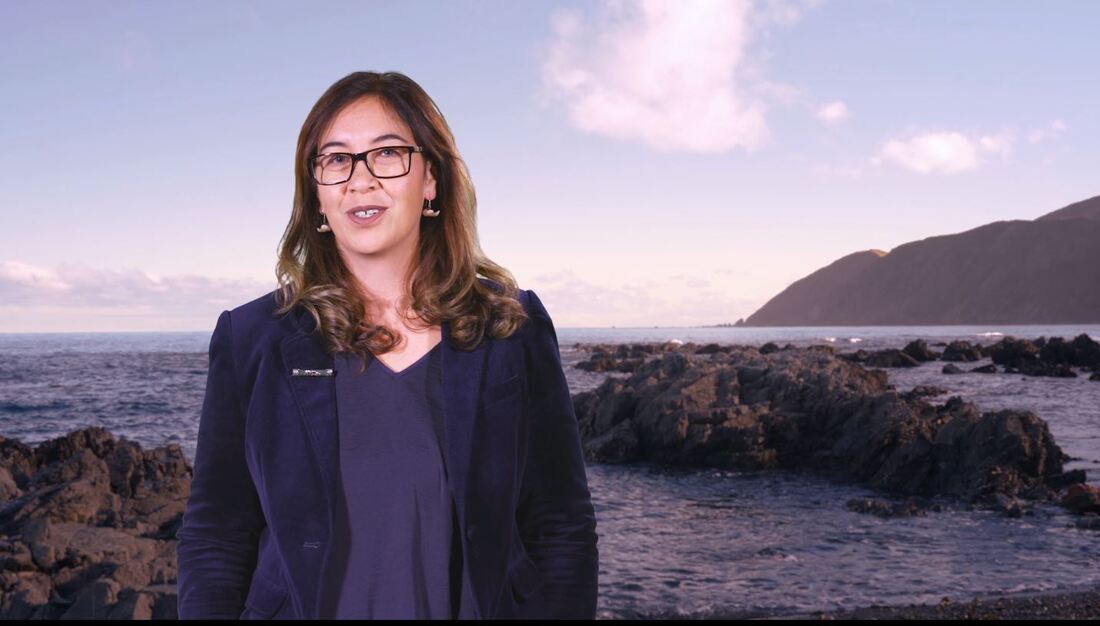
If you are filming an interview with only the interviewee visible in the shot, tell them where to look: either at the camera, or at you – avoid having them nervously glance back and forth.
If more than one person should be on camera, can they all be visible in the same shot? Having everyone in the same frame creates a slightly bigger distance between subjects and audience, but it has the advantage that you only need one camera. Plus, you won't need to do any editing afterwards. If it's a long conversation, it can seem a bit static without any cuts, but that's ok – as long as your audio is clear, your audience can treat it like a podcast and listen to what is being sad.
If you are filming an interview with only the interviewee visible in the shot, tell them where to look: either at the camera, or at you – avoid having them nervously glance back and forth.
What microphone(s) are you using to record sound?
If you only have one lapel microphone available, make sure you give it to the interviewee. If you're using a handheld directional microphone, make sure you point it directly at the person who is speaking, and be wary of knocking the microphone against things. If you are filming in a quiet location, an omni-directional table microphone might be a good solution, especially if you’re recording a conversation between multiple people.
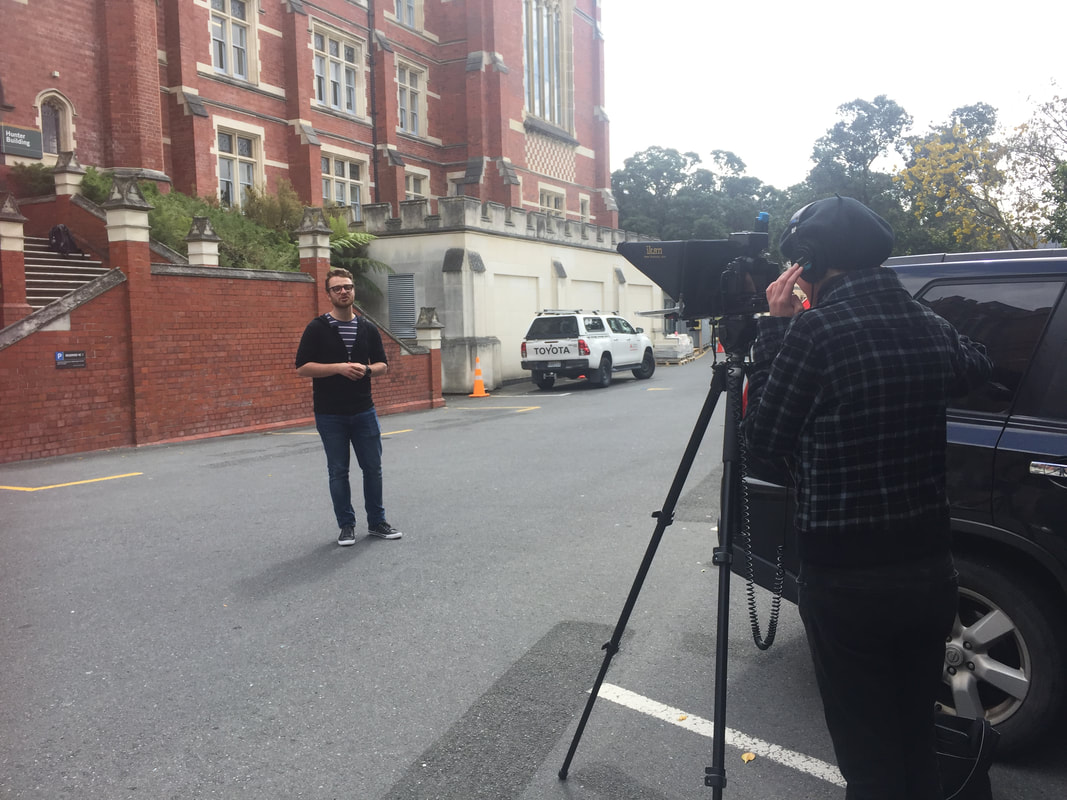
For a face to face interview, who will be operating the camera?
Is there anyone available with the filming? If you are all by yourself, it can be tricky to control and monitor the recording during the interview. Do a quick test recording (including an audio check!) before you film the entire interview.
Unless you have experience with handheld cameras and run-and-gun style interviews, use a tripod or otherwise steady your camera.
Unless you have experience with handheld cameras and run-and-gun style interviews, use a tripod or otherwise steady your camera.
This page was last updated March 2022