Scheduling Automatic Lecture Recordings
Lecture recordings can be scheduled ahead of time so that they start and end automatically to capture your lectures. This page contains instructions for scheduling automatic recordings.
Lectures can be scheduled to be recorded automatically in all main lecture theatres and seminar rooms. Once scheduled, the recording will start and finish at a prescribed time and will capture what is happening on all screens in the lecture theatre. It will capture audio from the microphones in the room but does not by default capture a video camera feed from the room.
Need to know how to access your video after it has been recorded? See our Managing Your Videos page.
How to schedule automatic recordings in lecture theatres
Alternatively, follow these steps:
- Go to your Blackboard course and select the VStream videos link in the menu.
- When VStream opens, click on the green Create button at the top in the middle of the window, and click Scheduled recording.
- Complete the form with a 'name for the recordings' (course number and 'lecture recordings' is suggested e.g. MARK101 2021 lecture recordings), check the folder indicated is the Blackboard course code you are recording for. Set Primary remote recorder as the lecture theatre you will be teaching in. Set start date as first lecture, set time (to be within the time slot the room is booked for your course and not beyond), select an end date and which days the recording repeats on at the same time in the same room.
- If you intend to webcast this session live, tick the Webcast session button (this can't be added to the schedule later, but you can add it to individual scheduled recordings).
- Then click Create button at the bottom. This will create a scheduled instance of all future recordings within your course.
- Your lectures will now record, please see things to remember in the teaching space.
Viewing your scheduled recordings
To view the schedule of recordings and delete any specific recordings which are not needed (e.g. for public holidays or when no recording is required) you will need to open the course folder in Panopto by clicking the 'Open in Panopto' icon on the right of the screen (indicated in the image below).
To view the schedule of recordings and delete any specific recordings which are not needed (e.g. for public holidays or when no recording is required) you will need to open the course folder in Panopto by clicking the 'Open in Panopto' icon on the right of the screen (indicated in the image below).
When you have opened the course folder in Panopto, you can check the box that says show scheduled recordings (circled in red in the image below) and see every instance set to record. Individual sessions can be amended or deleted.

Amending or deleting your scheduled recordings
Once you have set up your scheduled recordings, you can edit or delete individual upcoming sessions. To do this, view the list of scheduled recordings (see instructions above), find the session you want to amend or delete.
To delete the session: hover over the scheduled recording and click Delete. Confirm that you want to delete the session and it will be removed from your schedule.
To amend the session: hover over the scheduled recording and click Settings. In the pop-up window, within the Overview section, find the section that gives the recording time and date and click Edit. Here you can make changes to the remote recorder, time/date and webcast settings for that upcoming recording.
Note: you cannot edit an entire schedule of recordings. If you have made a mistake in the schedule, you are best to select all of the scheduled recordings, delete them, and then re-create your schedule.
|
Webcasting allows you to live stream the session you are recording. When setting up the schedule make sure you tick the 'Webcast session' check box. This means that when the recording starts the live feed will also be broadcast to students who have clicked on the link for the session.
The webcast link is accessed by students in one of two ways: 1. When the schedule is created and the webcast option selected, students can go to their Blackboard course, select the VStream videos link in the menu and any live sessions will show for them to click on. 2. When setting up the schedule for the recording/webcast the Overview details of the session provide a viewer link which can be posted up onto any Blackboard page/announcement. This method should be used to give students the link ahead of class time. Please make sure you make it clear for students where you will post up these Viewer links within your course so they know where to find them. |
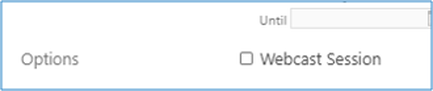
Webcast option when scheduling recordings
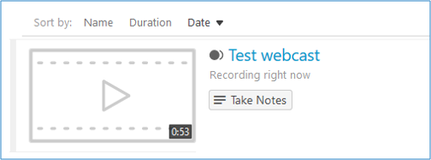
Student view of webcast session through VStream link in Blackboard
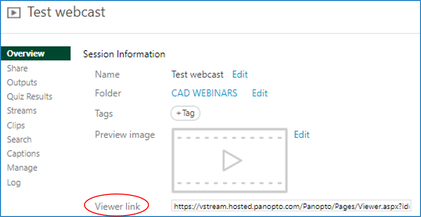
Viewer link to webcast session from scheduled session settings.
|
If you have already set up scheduled recordings and want to add the webcast option you need to edit the scheduled settings of each individual session:
Please remember when using webcasting that it is not a two-way communication with students, they are simply watching and listening. They will be by default only seeing your screens and hearing the audio.
- Go to Blackboard course, click VStream videos link.
- Once in the VStream folder for the course click on the 'open in panopto' icon (square with arrow point out on right of screen)
- Once Panopto has opened in another browser tab click on 'show scheduled' recordings check box.
- Find the session you wan to add webcast to, click on settings, go down to schedule recording section and click edit.
- Click on the check box to add 'Webcast session' and save.
Please remember when using webcasting that it is not a two-way communication with students, they are simply watching and listening. They will be by default only seeing your screens and hearing the audio.
